# ps aux –sort -rss | head -n 11

# ps aux –sort -vsz | head -n 11
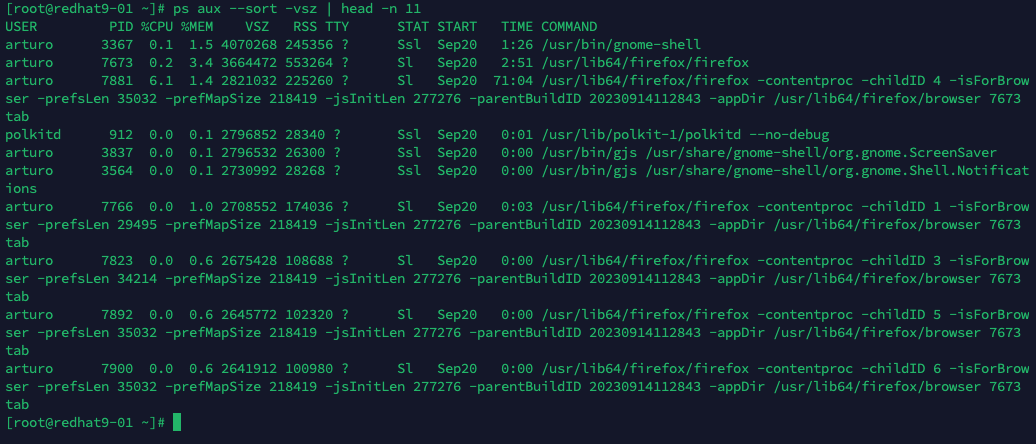

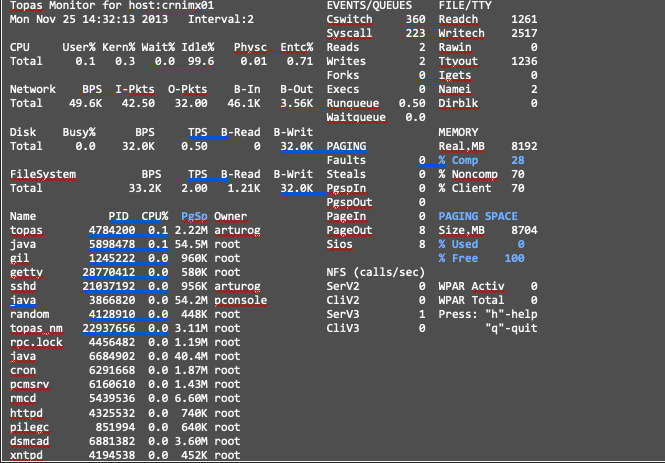
To see current swap usage utilization is using “top” (Linux, Solaris, HP-UX) or “topas” (AIX) commands. Identify memory and swap utilization.
“top” command Example:
# top

“topas” (AIX) Example:
# topas
To create an ext4 file system on Linux using LVM (Logical Volume Manager), follow these steps:
apt, and on Red Hat/CentOS, you can use yum:
For Debian/Ubuntu
sudo apt-get install lvm2 For Red Hat/CentOS
sudo yum install lvm2/dev/sdX with the appropriate device names:bash
sudo pvcreate /dev/sdXmyvg with your desired volume group name:bash
sudo vgcreate myvg /dev/sdX1 /dev/sdX2 # Use the appropriate device names/dev/myvg/mylv with your desired logical volume name and size:bash
sudo lvcreate -n mylv -L 10G myvg # Replace 10G with your desired sizemkfs.ext4 command:bash
sudo mkfs.ext4 /dev/myvg/mylvsudo mkdir /mnt/myext4 sudo mount /dev/myvg/mylv /mnt/myext4/etc/fstab file:bash
echo "/dev/myvg/mylv /mnt/myext4 ext4 defaults 0 2" | sudo tee -a /etc/fstab Replace /dev/myvg/mylv and /mnt/myext4 with your logical volume and mount point.df -h This command will show you the available disk space on the mounted ext4 file system.That’s it! You’ve created an ext4 file system on a logical volume managed by LVM. You can adjust the sizes and names to fit your specific requirements.
Troubleshooting a Linux system that does not boot can be a complex process, and the steps you take will depend on the specific symptoms and hardware involved. Here’s a general guide to help you diagnose and potentially fix the issue:
fsck or GUI-based tools./etc/default/grub and /etc/grub.d/) for errors or misconfigurations. You might need to regenerate the GRUB configuration using update-grub./var/log/syslog or /var/log/boot.log, for any clues about what’s causing the boot failure.Remember that diagnosing and troubleshooting boot issues can be complex, and it’s important to be cautious when making changes to your system. Be sure to back up your data before attempting any major fixes, and if you’re unsure about a particular step, seek assistance from experienced users or professionals.
Long time since I wanted to start this new blog, in the last five years I have experienced a few professional transitions, changing employer, from a Software Engineering role to System Administrator role, from developing and/or testing software for “Legacy” operating system and proprietary software to infrastructure Services Delivery using large scale UNIX and Linux customer’s environments. In the past trying to imagine what challenges Systems Administrators have to develop systems management software to actually know it from the first hand. Now in the last year got a new job role working on process, procedures and tools improvements and knowledge management activities for UNIX and Linux Infrastructure Delivery.
Some of my stronger skills are on operating systems running on Power Systems (AIX and IBM i). Since 2006 until 2013 I have participated as speaker and attendee on Power Systems technical conferences sharing experiences using “i” and AIX operating systems with Power Systems Community.
However we can see how business have been migrating workloads from “Legacy” operating systems to Linux successfully. For that reason one objectives for this year was to attend to a Linux community conference to get deeper skills on Linux. Late February I got an invitation from Linux Foundation staff to attend to Collaboration Summit 2014 that was an exclusive invitation-only event in Napa, CA, so I decided to take the opportunity to attend to tree day summit and also attend to an one day KVM workshop.
Knowing that open source linux virtualization technologies are getting mature, I decided to take KVM workshop and some of the Open Virtualization Sessions on the summit.
Kernel-based Virtual Machine (KVM) is an open source hypervisor that provides enterprise-class performance, scalability and security to run Windows and Linux workloads.
To get started with KVM I used my work business class laptop, to avoid changing the internal encrypted Windows disk setup, I used an external USB 3 portable disk to perform a CentOS 6.5 Linux Install, selecting “Virtualization Tools” and “Virtualization Platform” group installs. Other popular distribution will also include these virtualization tools like Redhat, Fedora or Ubuntu.
For detailed instructions you can consult Kernel Based Virtual Machine project site.
Performance was very good during the workshop, running the main Linux CentOS image with KVM hypervisor installed, a small custom linux distribution provided by the Instructor as a guest operating system and from my side I installed a Desktop Debian 7.4 as guest operating system to put more stress workload on the setup. That was just one day testing, but I am happy with the initial results. In the future I will be doing more prove of concepts installs to push KVM technology to the limit and continue learning about it.
During the Linux Collaboration Summit Sessions – Open Virtualization track, the message I got from speakers and other attendees was that KVM is ready for business to virtualize Linux workloads in the datacenter.
Some Open Virtualization technologies with more active development that are using KVM foundation includes:
In addition to this, other virtualization technologies also mentioned on the Summit are:
That give us a lot of open source virtualization technologies to review, use and learn in the future.
In addition to the Open Virtualization staff I can mention that first day keynotes provided a very good overview about Linux development trends and good understanding on how open source community collaborate.
Others interesting sessions I was able to attend where about how to go from an Idea to a Corporate Sponsored Open Source Project and Open Source Compliance, between others.
In summary Linux Collaboration Summit was a great way to understand how Linux Kernel and Open Source community collaborate and I look forward to collaborate with them in the future.

